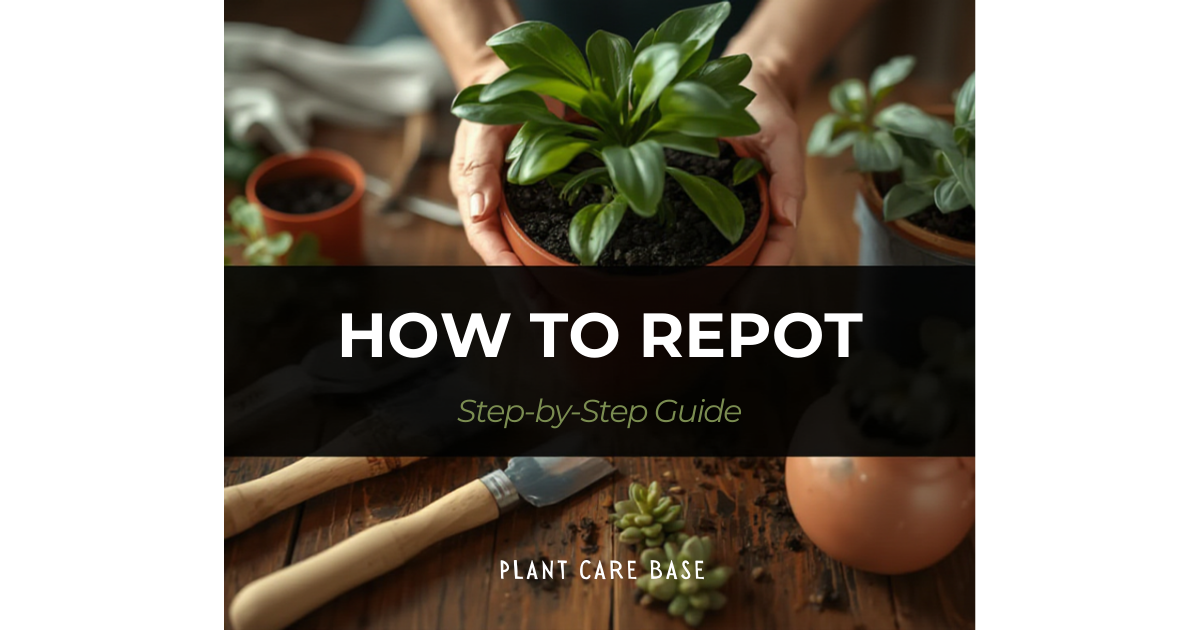
How to Repot Houseplants: A Simple Step-by-Step Guide
Learn when and how to repot your houseplants the right way. This beginner-friendly guide covers signs your plant needs repotting, choosing the right pot and soil, and step-by-step instructions.
There comes a moment in every plant owner’s life when you realize your plant has outgrown its home. Maybe you notice roots sneaking out of the drainage holes. Maybe water runs straight through the pot like it’s a sieve. Or maybe your plant just looks… stuck. It hasn’t put out new growth in months despite getting plenty of light and water.
That’s your cue. Your plant needs a new pot.
Repotting sounds intimidating if you’ve never done it, but it’s genuinely one of the simplest plant care tasks once you’ve done it once. I repot dozens of plants every spring, and the whole process takes about 10 minutes per plant. This guide walks you through everything: when to repot, how to pick the right pot, what soil to use, and the actual step-by-step process.
How Do You Know It’s Time to Repot?
Plants don’t need repotting on a fixed schedule. Some grow fast and need a new pot every year, while others are perfectly happy staying put for two or three years. Instead of guessing, watch for these signs:
Roots growing out of the drainage holes. This is the most obvious one. When roots start poking through the bottom of the pot, they’re telling you there’s no more room inside. Some plants, like pothos and spider plants, are especially prone to this.
The plant dries out unusually fast. If you’re watering every few days and the soil is bone dry each time, the root system has probably taken over most of the pot. There’s more root than soil in there, and the little soil that’s left can’t hold enough moisture. If you’re struggling to tell whether your plants need water, our overwatering vs underwatering guide can help you read the signs.
Water runs straight through without soaking in. When roots are packed so tightly that soil has been pushed aside, water just channels through the gaps and out the drainage holes. The roots barely get a drink even though you’re watering.
The plant looks top-heavy or tippy. When the foliage outweighs the pot, the plant starts to lean or fall over. That’s a sign the root system needs more space to anchor itself.
Slowed or stalled growth during growing season. A healthy plant that stops putting out new leaves in spring or summer might be rootbound. The roots have exhausted the nutrients in the soil and have nowhere left to grow.
You see salt buildup on the pot or soil surface. White crusty deposits on the rim of the pot or on top of the soil indicate mineral buildup from fertilizer and tap water. While you can flush the soil, this is often a good reason to repot with fresh mix.
One important thing: don’t repot a plant just because you bought it. New plants from the store are often in perfectly fine pots. Give them a few weeks to acclimate to your home before you start poking around their roots. The exception is if the plant is clearly in distress, visibly rootbound, or planted in soil that stays soggy for days.
When Is the Best Time to Repot?
Spring is the sweet spot. As days get longer and temperatures warm up, houseplants kick into their active growth phase. Repotting in spring means the plant can quickly grow new roots into the fresh soil and recover from any minor root disturbance.
Early to mid-spring is ideal. The plant is waking up but hasn’t put all its energy into new foliage yet, so it can redirect resources into root growth.
Summer works too, especially early summer. The plant is growing actively and will handle the transition fine.
Avoid repotting in winter if you can. Most houseplants are dormant or semi-dormant during the cold, short days of winter. Their root growth slows to a crawl, which means they’ll sit in fresh, wet soil for too long without growing into it. That’s a recipe for root rot.
The exception? If your plant is in bad shape, a sick plant in waterlogged or depleted soil, don’t wait for spring. Emergency repotting to save a plant is always justified regardless of the season.
Choosing the Right Pot
Getting the pot right matters more than most people realize. Here’s what to look for:
Size
Go up one size. That means a pot that’s 1 to 2 inches larger in diameter than the current one. If your plant is in a 4-inch pot, move it to a 5 or 6-inch pot.
Resist the temptation to jump to a much bigger pot. I know it seems efficient, like you won’t have to repot again for a while, but a pot that’s too large creates a problem. All that extra soil holds moisture that the roots can’t absorb. The soil stays wet for too long, and wet soil that isn’t being used by roots becomes a breeding ground for root rot and fungal issues.
The one exception is really fast-growing plants during peak summer. Something like a monstera that’s visibly pushing out growth might handle a jump of 2 to 3 inches without issues.
Drainage
Your pot must have drainage holes. This is non-negotiable. Without drainage, excess water has nowhere to go and will pool at the bottom, suffocating the roots. If you fell in love with a decorative pot that has no holes, use it as a cachepot: put your plant in a slightly smaller nursery pot with drainage, and set that inside the decorative one. Just remember to empty any water that collects in the outer pot after watering.
Material
Each material has trade-offs:
- Terra cotta is porous, so it wicks moisture away from the soil. Great for plants that like to dry out between waterings, like snake plants. Heavier, which helps with top-heavy plants.
- Plastic is lightweight, cheap, and retains moisture longer. Good for plants that like consistently moist soil, like peace lilies or calatheas.
- Ceramic (glazed) looks beautiful, holds moisture like plastic, but is heavier and more expensive. Good middle ground if you want something decorative.
Picking the Right Soil Mix
Don’t just grab any bag of dirt. Different plants have different soil preferences, but for most tropical houseplants, you want a mix that is:
- Well-draining so roots don’t sit in water
- Moisture-retentive enough to keep roots hydrated between waterings
- Loose and airy so roots can breathe and grow easily
A standard indoor potting mix with added perlite is a solid starting point for most houseplants. I typically do about 2 parts potting mix to 1 part perlite. The perlite (those little white crunchy bits) creates air pockets in the soil and improves drainage significantly.
For plants that like to dry out fast (snake plants, succulents, ZZ plants): Add extra perlite or coarse sand. You want a mix that drains almost immediately and doesn’t stay moist for long.
For plants that like moisture (peace lilies, ferns, calatheas): Stick with the standard mix without extra perlite. You can even mix in a small amount of coconut coir to help retain moisture.
For aroids (monstera, pothos, philodendrons): These love chunky, well-aerated soil. Mix in orchid bark, charcoal, and perlite with your potting mix. The bark creates large air pockets that aroid roots absolutely love.
Never use outdoor garden soil for houseplants. It’s too dense, doesn’t drain well in pots, and can introduce pests and diseases.
What You’ll Need
Gather everything before you start. Once you have a plant out of its pot with bare roots, you don’t want to be scrambling for supplies.
- New pot (1-2 inches larger, with drainage holes)
- Fresh potting mix (appropriate for your plant type)
- Perlite (for amending the soil if needed)
- A trowel or large spoon (for scooping soil)
- Newspaper, a tarp, or an old towel (to catch the mess)
- Watering can (for post-repotting watering)
- Scissors or pruning shears (for trimming dead roots)
Optional but helpful: a chopstick or pencil for working soil around the roots, and a bucket for pre-mixing your soil blend.
Step-by-Step: How to Repot
Step 1: Water the Day Before
Give your plant a good watering about 24 hours before you plan to repot. Moist soil is much easier to work with than bone-dry soil, and hydrated roots are more flexible and less likely to snap. Don’t water right before repotting though, since you don’t want to be working with mud.
Step 2: Prepare the New Pot
Add a layer of fresh potting mix to the bottom of the new pot. How much? Enough so that when you set the plant inside, the top of the root ball sits about half an inch below the rim of the pot. You’ll probably need to eyeball this and adjust.
Some people put gravel or broken pottery pieces over the drainage holes. You can if you want, but it’s not necessary. Research has shown that a gravel layer doesn’t actually improve drainage. It just creates a perched water table. Skip the gravel and just make sure the drainage holes are open.
Step 3: Remove the Plant from Its Old Pot
This is the step that scares people, but it’s easier than you think.
- Tip the pot on its side and gently squeeze the sides if it’s a flexible plastic pot. This loosens the root ball from the walls.
- Support the base of the plant with one hand, fingers straddling the stem at the soil line.
- Slide the plant out. If it’s stuck, run a butter knife or thin trowel around the inside edge of the pot to loosen it. Don’t yank on the stems.
For really rootbound plants, you might need to cut the pot off. A cheap nursery pot can be snipped with scissors. It’s faster and safer than fighting with a stuck root ball.
Step 4: Inspect and Loosen the Roots
Now that the root ball is out, take a look at what you’re working with.
Healthy roots are firm and white or light tan. They might be thick and fleshy or thin and wiry depending on the plant species.
Problem signs:
- Brown, mushy, or smelly roots mean rot. Trim these off with clean scissors, cutting back to healthy tissue. If you find extensive rot, check our root rot guide for a thorough treatment plan.
- Circling roots happen when roots hit the wall of the pot and start growing in circles. Left unchecked, they’ll essentially strangle the plant. Gently tease them apart with your fingers.
Loosen the root ball. Gently tease apart the outer roots with your fingers. You don’t need to remove all the old soil, but loosening the roots encourages them to grow outward into the new soil instead of continuing in their old circular pattern. Be gentle. It’s okay if some roots break. Plants can handle some root loss during repotting.
If the roots are really tangled and matted, you can make 3 or 4 shallow vertical cuts along the sides of the root ball with a clean knife. This sounds brutal, but it actually stimulates new root growth from the cut points. Only do this with severely rootbound plants.
Step 5: Place the Plant in Its New Pot
Set the root ball on top of the soil layer in the new pot. Check the height: the top of the root ball should sit about half an inch below the rim of the pot. Adjust the bottom soil layer if needed.
Important: Don’t bury the stem deeper than it was before. Planting too deep can cause stem rot, especially with plants like snake plants that are prone to it. Match the original soil line as closely as possible.
Center the plant in the pot and hold it in place with one hand while you fill around the sides with the other.
Step 6: Fill in with Fresh Soil
Add potting mix around the root ball, filling in the gap between the roots and the pot walls. Use your fingers or a chopstick to gently work the soil down and eliminate air pockets. Don’t pack it down hard. You want the soil firm enough to support the plant, but loose enough for roots to grow through and for water to flow.
Leave about a half inch of space between the soil surface and the rim of the pot. This gives you room to water without it spilling over the edge.
Step 7: Water Thoroughly
Give the plant a deep watering right away. Pour water slowly until it runs out of the drainage holes. This settles the soil around the roots and collapses any remaining air pockets.
You’ll probably notice the soil level drops a bit after watering. That’s normal. Top it off with a little more potting mix if needed, but don’t cover the stem any higher than it was.
Step 8: Find the Right Spot
Put the plant back in its usual spot or somewhere with similar light conditions. Don’t move a freshly repotted plant into brighter light than it’s used to. The roots are recovering and can’t support increased light demands right away.
Aftercare: The First Two Weeks
Your plant might look a little sad after repotting. Some drooping, a few yellowing lower leaves, or a pause in growth is totally normal. This is called transplant shock, and most plants bounce back within one to two weeks.
During this recovery period:
- Water normally, letting the soil dry appropriately between waterings based on the plant’s needs
- Don’t fertilize for at least 2 to 4 weeks. Fresh potting mix already contains nutrients, and the roots are too stressed to handle fertilizer right away. Adding it too early can burn the roots.
- Avoid moving the plant around. Let it settle in one spot.
- Don’t panic if a few older leaves yellow and drop. The plant is redirecting energy to root growth. New leaves will follow once the roots are established.
If drooping lasts more than two weeks or gets worse, something else might be going on. Check whether the soil is staying too wet (possible root rot) or drying out too fast (roots not established yet).
When NOT to Repot
There are a few situations where repotting does more harm than good:
While the plant is flowering. Blooming takes a ton of energy. Disturbing the roots mid-bloom can cause the plant to drop its flowers. Wait until flowering is done.
When the plant is stressed from pests or disease. Treat the problem first, let the plant recover, then repot if needed. Repotting a sick plant adds stress on top of stress.
Right after bringing a new plant home. Give it at least 2 to 4 weeks to adjust to your home’s light, temperature, and humidity before repotting.
In the middle of winter (unless it’s an emergency). Dormant plants don’t grow new roots quickly, so fresh wet soil just sits there creating conditions for rot.
Repotting vs. Top Dressing
Not every plant needs a full repot every time. If your plant seems healthy but the soil looks tired and depleted, you can top dress instead:
- Scrape off the top 1 to 2 inches of old soil
- Replace it with fresh potting mix
- Water it in
Top dressing refreshes the nutrients in the soil without disturbing the roots at all. It’s a great option for large plants that are difficult to move or for plants that don’t like being disturbed.
Quick Reference: Repotting Guide by Plant
| Plant | How Often | Best Soil Mix | Pot Material |
|---|---|---|---|
| Pothos | Every 1-2 years | Standard mix + perlite | Any |
| Monstera | Every 1-2 years | Chunky aroid mix | Any with support |
| Snake Plant | Every 2-3 years | Cactus mix or extra perlite | Terra cotta |
| Spider Plant | Every 1-2 years | Standard mix + perlite | Any |
| Peace Lily | Every 1-2 years | Standard mix, moisture-retaining | Plastic or ceramic |
| Calathea | Every 1-2 years | Standard mix + some coir | Plastic |
Repotting is one of those plant care skills that feels like a big deal until you actually do it. Then you realize it’s just giving your plant a bigger house with fresh soil. Your plant will thank you with a burst of new growth once those roots settle in. And honestly, getting your hands in the dirt and seeing a healthy root system is one of the more satisfying parts of being a plant person.
Frequently Asked Questions
How often should you repot houseplants?
What time of year is best to repot houseplants?
Should I water my plant right after repotting?
Can repotting kill a plant?
Don't miss our guides
Weekly plant care newsletter.